Before we delve into the repair process for a single handle cartridge faucet, let’s provide a brief explanation about this type of fixture. A cartridge faucet is a special fixture that contains a hollow metal or plastic cartridge insert, which creates a seal against the spout.
Although you may have encountered cartridge faucets numerous times without realizing it, they are commonly found in kitchens and bathrooms. Their primary purpose is to regulate water flow at different temperatures. For instance, in addition to turning the water on and off by raising or pushing down the lever, a single handle cartridge faucet allows you to adjust the water temperature by slightly moving it to the left or right.
While cartridge faucets are available in single-level and two-handle versions, we will specifically focus on the repair procedure for a single handle cartridge faucet today. You don’t necessarily have to spend a significant amount of time and money on a new faucet. With a few simple instructions and the right tools, you can make the repair process much easier. However, if the faucet is beyond repair, you will need to consider replacing it.
It’s important to note that some faucets have complex structures and may require professional assistance. Nevertheless, the instructions provided below will generally apply to most situations.
Before we proceed with the actual steps, it’s advisable to gather the necessary tools and keep them readily accessible on your countertop. These tools and materials will assist you in repairing your single handle cartridge faucet:
- Old toothbrush
- Heatproof silicone plumber’s grease
- Screwdriver
- Cleaner to remove mineral build-up
- Pipe wrench or channel-type pliers
- Allen (hex) wrench
- Replacement cartridge valve
- Utility knife
Do you need all these tools? Not necessarily. However, having these tools at your disposal can greatly aid in fixing or reinstalling the cartridge faucet, as each tool serves a specific function throughout the repair process.
Step #1 – Turn Off The Water Supply

To prevent water from flowing on the floor or being wasted in the sink, it’s important to begin by turning off the water supply. Typically, you can find the shut-off valve beneath the sink.
Look for a small valve that serves as the water shut-off option. Simply turn the valve handle to the off position in order to stop the water supply.
Step #2 – Remove The Handle Screw

Taking off the handle can be a bit challenging, requiring the use of an Allen wrench.
Typically, you’ll find an exposed Allen-head set screw on the side of the handle. However, it can be tricky because some manufacturers deliberately conceal the screw that secures the handle.
To properly remove the handle, employ an Allen wrench. Lift the handle slightly to facilitate its removal, preventing unnecessary struggle in the process.
Step #3 – Remove The Faucet Cartridge

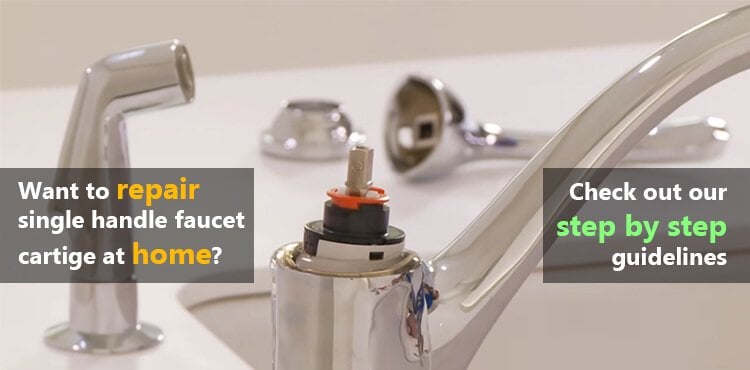
Once you have successfully removed the handle, you will encounter the exposed disc cartridge.
It’s important to note that you can’t simply pull it out right away, as there may be a retainer nut, retainer clip, or screw securing it in place. In most cases, cartridges are held in position by a retainer nut, which needs to be unscrewed by turning it counterclockwise.
However, if you’re dealing with a new or expensive cartridge faucet, there might be additional decorative components that need to be removed first. Nevertheless, in most traditional faucets, the cartridge becomes visible once the handle is removed.
If there isn’t a retaining nut present, it indicates a more complex cartridge faucet design. In such cases, you’ll need to unscrew the decorative collar and the bracket attached to the cartridge using a Phillips-head screw. Once these two elements have been removed, you may find a ring inside that helps guide the movement of the handle.
After removing these additional components, you will be able to locate the retainer nut responsible for securing the cartridge in place.
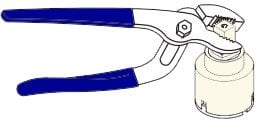
Now, proceed to lift the cartridge out of the faucet body. If necessary, you can use pliers for this task, ensuring that you protect the cartridge from any damage. Additionally, take note of its orientation so that you can reinstall it in the same manner later.
Once the cartridge is removed, inspect it to determine the underlying cause of the malfunction. If the issue stems from dirt or grease, you can clean the cartridge using an old toothbrush and a suitable cleaner.
Afterward, reassemble all the components and reinstall the cartridge to test the faucet again.
If the faucet is now functioning properly, congratulations!
However, if nothing has changed and the leakage problem persists, it indicates that the rubber seals within the cartridge are damaged beyond repair. In this case, you will need to purchase a new cartridge from a local home improvement store.
Check out our list of Best Kitchen Faucet
Step #4 – Install The New Cartridge
The new cartridge often comes as part of a kit, which includes a square-topped plastic removal tool. However, before selecting the new cartridge, it is advisable to bring the old one along to ensure an exact replacement from the store.
Prior to installing the new cartridge, remember to thoroughly clean the inside of the faucet body. If you don’t have a specific cleaner available, vinegar can also be used effectively.
Furthermore, apply lubrication inside the valve body. This will not only prolong the lifespan of the cartridge but also maintain the rubber seals in good condition over time.
Now, carefully position the new cartridge inside the faucet body, ensuring alignment with the corresponding notches and holes. Gently press it down until it is fully seated.
Next, secure the cartridge in place by replacing the nuts or screws.
Once this is done, reinstall the faucet handle by tightening the set screw using an Allen wrench.
Finally, turn the water valves back on to test for any leaks.
Concluding Thoughts
And that’s the complete process for repairing a single handle cartridge faucet.
By following the steps outlined above, you can successfully complete the repair task in no time. Even individuals without technical expertise can comfortably undertake this repair with the appropriate set of tools. If you happen to notice that the hot and cold water controls are reversed after reassembling the faucet, it indicates that the cartridge was installed backward.
Simply repeat the process and rotate the cartridge 180 degrees before reinstalling it to ensure the proper orientation.

