Remodeling your entire home can be challenging, especially if you don’t know where to start or have zero ideas on making a space look cleaner and more put together.
Well, why not start with the bathroom? The master bathroom, at least. You might think that bathrooms are useless to update as they are made for the mess. But actually, upgrading your bathroom space can make a whole lot of difference!
Taking a few days to think about which features to upgrade in your bathroom is a must. Think about the storage, organization, installing more lights, mirrors, and such. Take all of this into consideration, and then you should be able to come up with a blueprint of how you want your bathroom to look like.
Normally, not everyone finds bathtub useful. So, why not convert it into something more functional? Something like a combination of a bathtub and shower turned into a walk-in type of space!
If you look around the Internet, you’ll most probably find conflicting ideas and opinions about getting a walk-in shower. But it’s always up to you and your needs, and that should determine whether or not your bathroom space is fit for a makeover.
Nevertheless, you can turn an old bathroom into a fresh new space with elegant details in just a few quick, easy steps.
DIY Tips- How to Install a Walk In Shower Kit
Check out the following steps you can do to transform your bathroom space into a walk-in shower area.
First Step: Tearing Down
Trying to follow a tight budget? One perfect way not to overdo your budget is by taking on the demolition and tearing down process yourself. However, just make sure you do it the right way.
Turn off all your water supply and start disconnecting the water fixtures. Then you can begin tearing down old pieces. You will most likely need a simple drywall jab saw, a pry bar, and a fair amount of strength in your arms to tear down your wall or tires. If you have a bathtub, removing it depends on the type you have, but it’ll most likely be an easy process.
If you’re not entirely confident in doing this on your own, you might want to leave this first step up to professionals then. Just so you could avoid damaging or breaking crucial water pipes.
Second Step: Adding Some Space
If you still haven’t thought about adding some extra space in your bathroom to make room for the walk-in shower, well, now’s the time to consider it. An additional foot of space taken from a room or closet will make a significant difference in your shower.
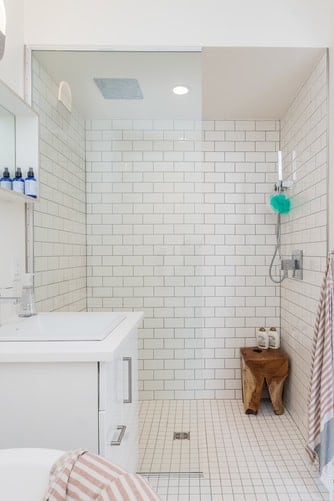
But, if you’re not a fan of this, you can add a sitting bench or some extra storage mounted up on the wall instead.
A sitting bench will make an entirely colossal difference in your bathroom. You can either use this as storage where you can place bath essentials like shampoo, conditioner, and shower gels. Or use it as it is--a bench for when you’re waxing or doing other self-care routines while in the bath.
Third Step: Reconstruction and Plumbing
If you’re on a tight budget, you can install the same pipes and drain you already have in place. But keep in mind that the possibilities remain endless if you want to upgrade your shower area of add more touches and fixtures.
You can choose plenty of shower systems, toilet partitions, and other fixtures in hardware stores ranging from style, color, finish, special features, and price.
Fourth Step: Choosing The Type of Floor
One important decision you have to make is whether or not to integrate a curbed shower. And this is not just about the materials you will be using, but rather the type of floor plan you’d want for your walk-in shower space.
You can always choose between these two types:
- 1Curb Design - Having something to step over as you enter the shower
- 2Curb-less Design - The shower and surrounding bathroom floor are at the same level; much like an open floor plan, but in the bathroom
To help you decide on which one to get for your walk-in shower, here’s a quick advantage and disadvantage of both designs:
Curbed designs are arguably easier and cheaper to install than curb-less ones. Not to mention, it ultimately helps keep the water inside the shower.
Meanwhile, curb-less designs are a lot more challenging to install, especially if it’s your first time to DIY. But, it’ll definitely give your entire bathroom an open floor plan, which is best for bathrooms with smaller spaces as it essentially gives off the idea of a larger area since there are no transitions whatsoever on the way to the shower.
Fifth Step: Installing The Tile

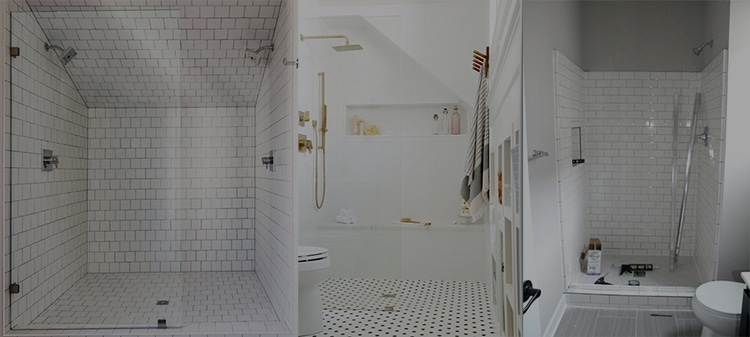
Now we’re down to one of the hard parts. With hundreds and thousands of designs to choose from, picking your tiles for the bathroom floor can be a bit of a challenge. This is an essential aspect of the bathroom remodel that will ultimately give your bathroom the style of your dreams.
Before purchasing and installing your tiles, make sure it’s precisely the design you’re going for.
It helps if you consult with a contractor or a professional that could help you decide on which ones to pick. Try to integrate your imagination or idea with a professional’s point of view.
That way, you don’t have to worry about getting stuck with the least of your choice for the next 5 years or so.
Sixth Step: Installing The Closure
Now it’s time to keep the water out of the way and make it stay where it’s supposed to stay. Installing a closure to your walk-in shower is the final addition that gives your whole bathroom that fresh and elegant feel to it.
Might I suggest you install a tempered glass divider to make the bathroom look bigger and brighter?
However, you can also opt for a much more opaque shower door if you prefer a little bit of privacy. This works well for more oversized bathrooms. That way, you wouldn’t have to compromise space and storage.
A Few Points To Remember
Now that you’ve had a run-through of how to install a walk-in shower kit, here are a few more things you need to keep in mind to make the most out of your DIY project:
Mind the Details
Pay attention to details! Don’t just pour everything out on the remodeling part. Consider getting high-quality pieces that will also match your walk-in shower’s theme. Getting a durable shower faucet and valve helps keep your budget [and your bathroom] at a score. This will ultimately help keep you from repurchasing shower faucets every month or so, saving you a great deal of cash.
Besides that, have a quick look at some of your other bathroom essentials and storage. Do you need a new soap dispenser? Are your storage boxes and cabinets enough for all your bathroom goodies? Think you need a new bathroom mat? How about you throw in some fresh, new guest bath towels? Or maybe get yourself a unique vanity mirror as your old one has started cracking, which might lead to accidents.
As you make your way into completing this DIY project, make sure you also pay attention to the smallest details in your bathroom. That way, you’ll only have to take a quick one-way trip down the store to get everything you need.
Follow The Theme
Now, you wouldn’t want to stay focused on one area of the bathroom, would you? Make sure you consider not only remodeling the shower area but also the entire bathroom as well.
As much as possible, try to stay in line with your current bathroom theme. Or better yet, decide on a completely new look and pay attention to following one consistent theme throughout the entire bathroom space.
Watch Out For Other Fixtures and Improvements
In the process of installing your walk-in shower kit, you might unintentionally chip off a paint job or notice a few other details that need fixing and improvement. Might as well turn the DIY into a whole new bathroom remodeling project.
On your way to the store to buy your shower kit materials, make sure you also push a run for other bathroom fixtures, furniture, and other features that you will need to complete the whole look.
Wrapping Up
Home remodeling is definitely not an easy feat, but you’ll get the hang of it soon once you finally start putting yourself out there. After putting much work in your new bathroom with an all-new walk-in shower space, why not try the bedroom next? Or the living room? How about a quick kitchen remodel? Tune in for more home improvement DIY tips and tricks!

